Rendering multiple render passes or textures
Use a Blit Render Pass to blit multiple Composition Target Render Pass render passes or textures to the screen using a specific material. By default a Blit Render Pass uses only one Composition Target Render Pass or texture.
For example, you can blit multiple render passes to the screen using a specific material to create post-processing effects, such as bloom. See Tutorial: Create a bloom effect.
To blit multiple Composition Target Render Pass render passes or textures to the screen:
- Create a material type which supports blitting multiple textures. See Modifying the DefaultBlit material type to support multiple textures.
- Use a Blit Render Pass to blit multiple Composition Target Render Pass render passes or textures to the screen. See Blitting multiple textures to the screen.
Modifying the DefaultBlit material type to support multiple textures
To make the DefaultBlit material type support multiple textures:
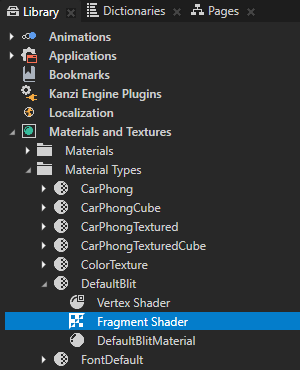
- In the Library > Materials and Textures > Material Types > DefaultBlit double-click the Fragment Shader to open it in the Shader Source Editor.
TIPIf your project does not contain the DefaultBlit material type, in the Library > Materials and Textures press Alt and right-click Material Types, and select DefaultBlit.
- In the Shader Source Editor add the uniforms you want the Blit Render Pass to use and modify the shader to use them.
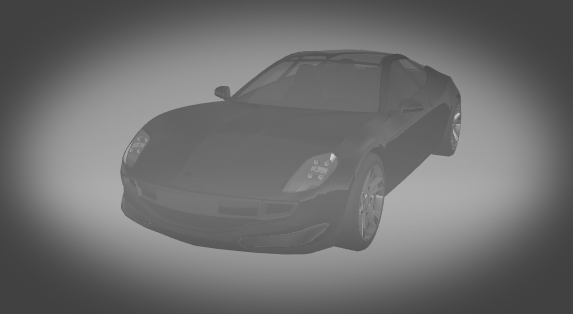
For example, to make the shader mix the Texture0 and Texture1 properties using the custom property Weight to weigh between them, replace the contents of the shader file withuniform sampler2D Texture0;
uniform sampler2D Texture1;
uniform mediump float Weight;
varying mediump vec2 vTexCoord;
void main()
{
precision lowp float;
gl_FragColor = mix(texture2D(Texture0, vTexCoord), texture2D(Texture1, vTexCoord), Weight);
}Click Save.
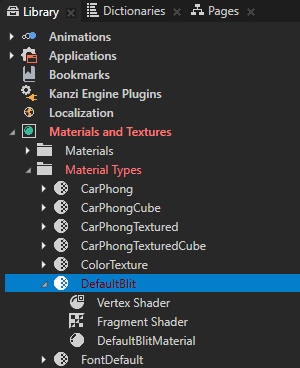
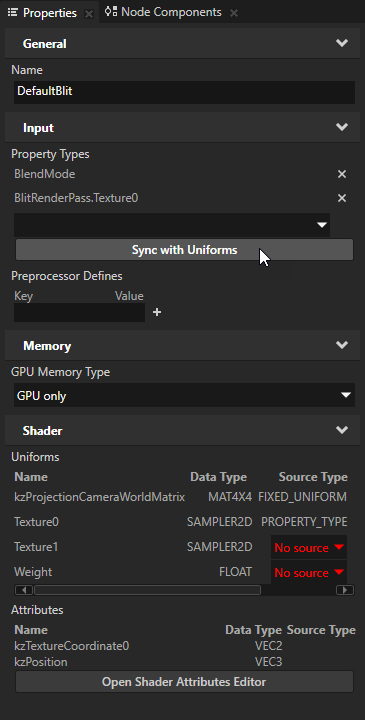
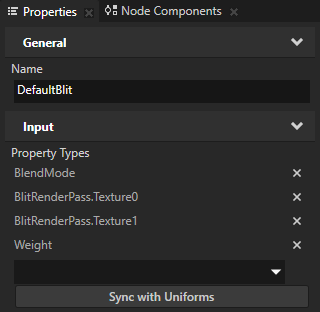
- In the Library > Materials and Textures > Material Types select the DefaultBlit material type and in the Properties click Sync with Uniforms to create and add the properties you defined in the fragment shader to this material type and the materials that use it.
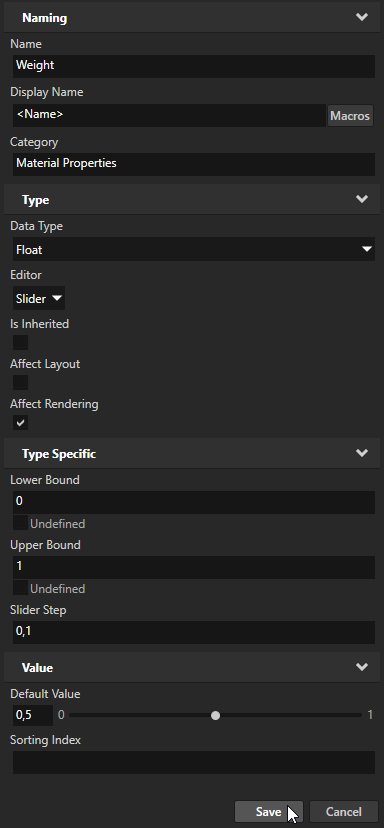
- In the Create Property Type window click Yes to create the custom property type Weight you use to weigh between the Texture0 and Texture1 properties, in the Property Type Editor set the Default Value property to 0,5, and click Save.

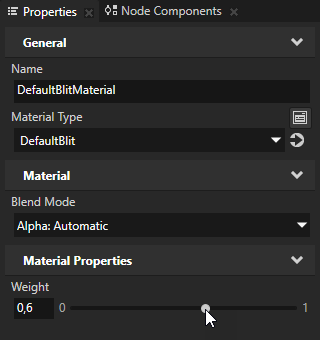
- (Optional) When you set the Default Value of the Weight property type to 0,5, the materials that use the DefaultBlit material type by default show the average of the Texture0 and Texture1 properties. To adjust this select the material that uses the DefaultBlit material type and set the value of the Weight property. To give more weight to Texture0, decrease the value of the Weight property, and to give more weight to Texture1, increase the value.
- Use DefaultBlitMaterial in a Blit Render Pass to blit multiple Composition Target Render Pass render passes or textures to the screen. See Blitting multiple textures to the screen.
Blitting multiple textures to the screen
You can use a Blit Render Pass to blit multiple Composition Target Render Pass render passes or textures to the screen.
To blit multiple Composition Target Render Pass render passes or textures to the screen:
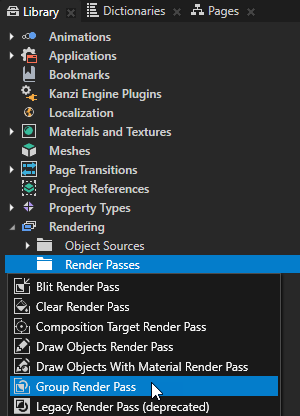
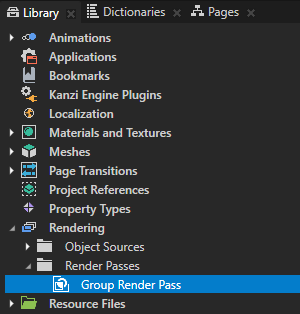
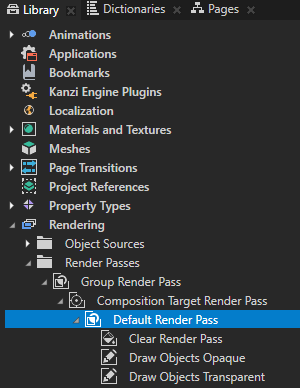
- In the Library > Rendering > Render Passes create a Group Render Pass.
Group Render Pass allows you to collect render passes so that you can refer to a single render pass in your Scene or Viewport 2D node.
- Create the render passes that you need to render content to a composition target:
- In the Group Render Pass create a Composition Target Render Pass.
Composition Target Render Pass renders itself and its child render passes to a composition target.

- In the Composition Target Render Pass create the render passes that render the content that you want to use.
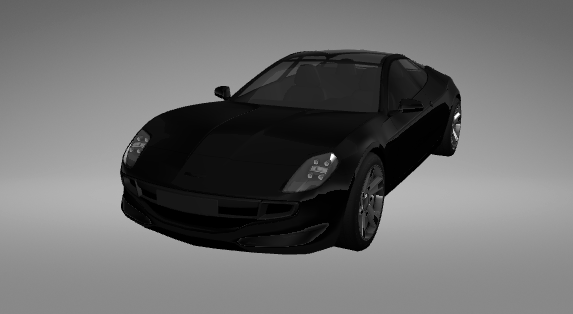
For example:- Create a Default Render Pass.
Default Render Pass creates a basic set of render passes that first render opaque nodes and then transparent nodes.
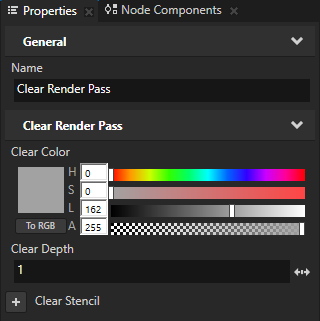
- In the Default Render Pass > Clear Render Pass add and set the Clear Color property.
You clear the color buffer with the color you set in the Clear Color property and set the background color of the scene.

- In the Project select the Scene node the content of which you want to render to a composition target and in the Properties set the Render Pass property to the Group Render Pass you created in the first step.
Kanzi now renders the Scene using the render passes you created. Kanzi renders the content to a composition target which is why you do not see the content in the Preview.


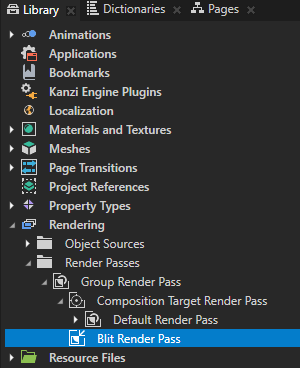
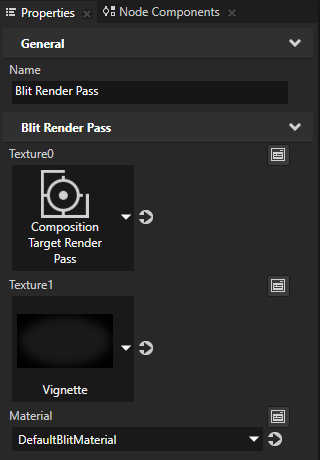
- In the Group Render Pass create a Blit Render Pass and in the Properties set:
- Texture0 to the Composition Target Render Pass that you created
- Material to the material you want the Blit Render Pass to use
For example, set it to DefaultBlitMaterial.
This way you set the Blit Render Pass to draw the contents of the Composition Target Render Pass to the screen using a specific material.
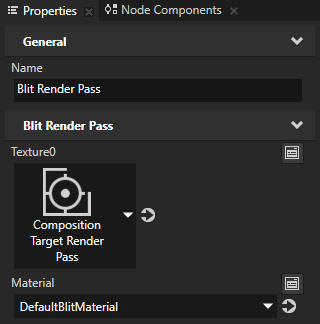
- In the Library select the Blit Render Pass you created and in the Properties add and set the Texture properties to the texture or Composition Target Render Pass that you want to use.
For example, add the Texture1 property and set it to a texture resource.
See also
Tutorial: Create a bloom effect
Rendering
Using material types
Shaders
Textures

Open topic with navigation